Popular Posts

Sunday, 28 February 2016

Winter special- Hara lahsun ka paratha( green garlic paratha)

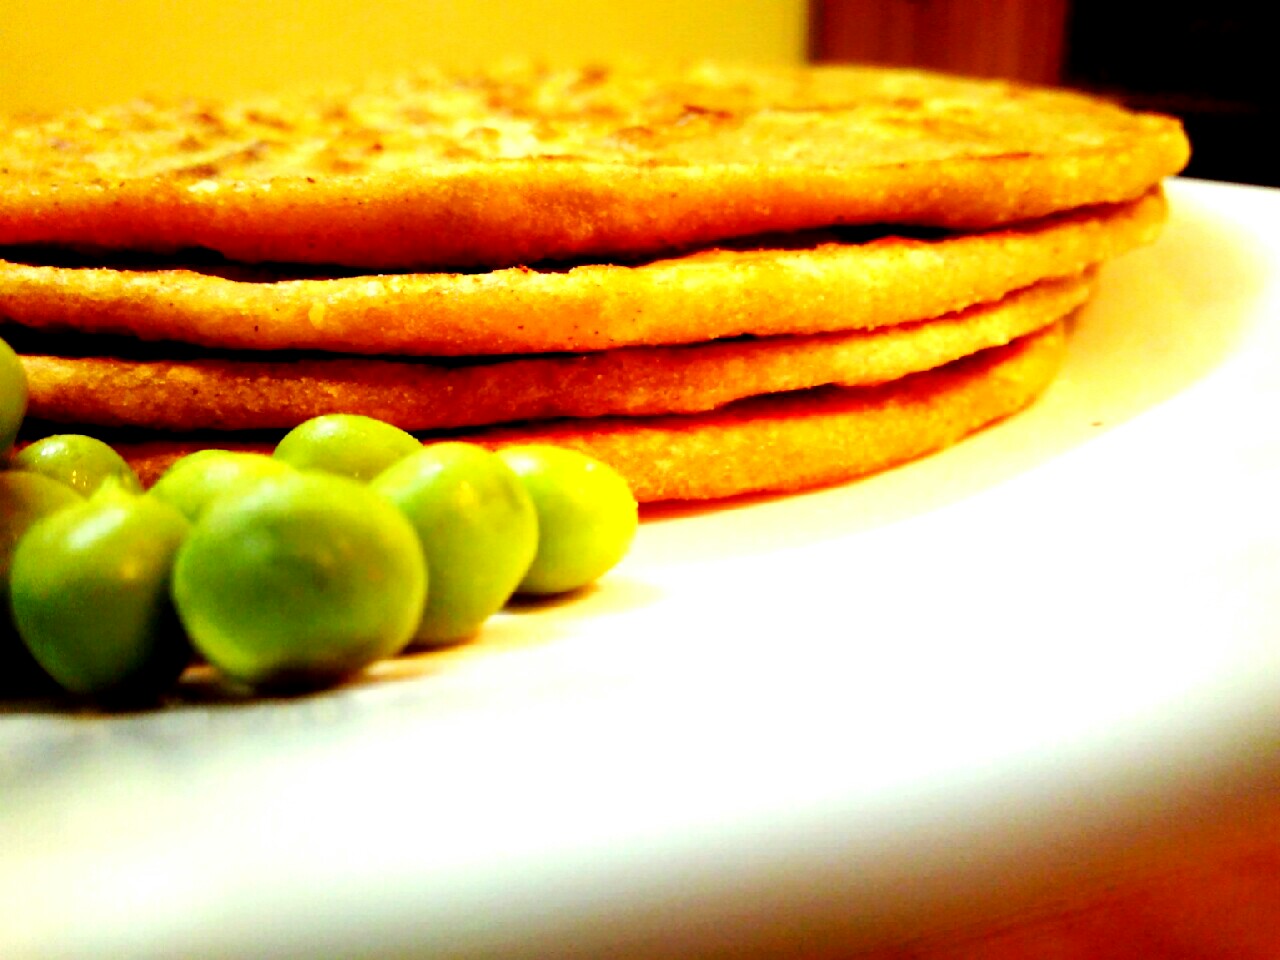
                 Green garlic paratha

                 (hara luhsun parattha)


Hello. 
Everyone,

Welcome to our kitchen..
Today we are going to make hara lahsun paratha..( green garlic leaves paratha)..

I am sure that you have heard first time this type of paratha ever.
Ya, I am going to make green garlic leaves stuffed paratha.
It is my mom special paratha.crunchy, crispy and tasty paratha.

Awesome garlicky taste of paratha make this paratha differ from other parathas.
Sounding unusal na..but true..You can stuff green garlic in dough and make this very yummy paratha.

My papa's favourite.. Paratha.
He always enjoy this paratha in every winter.

So friend,

Healthy and tasty  paratha is waiting for your review.  I am using very few ingredients in making these parathas.. Green garlic leaves and green chillies.

If you like garlic then make it and enjoy the benefits of garlic in natural way in your meal.
It goes perfect with  curd and aachar/ mithi chutney.


Preperation time: 10 minutes
Cooking time 10-15 minutes
Makes 7-8 parathas


Ingredients-


For dough-

2 cup wheat flour
1 cup maida( refine flour)
4-5 tbsp of wheat flour for dusting
1 tsp ajwain
Salt to taste
1 tbsp of refine oil
Water for kneading dough


For stuffing--


250 gram wash cleaned and finely chopped green garlic( hara lahsun)
5-6 finely chopped green chilies
Salt to taste
1 tbsp of melted ghee/ refine oil


Method-


( For stuffing)---


*Heat 1Tbsp of ghee / refine in a pan /kadhai.
*Add chopped green garlic , green chillies and salt and saute for 2-3 minutes on medium heat.
( make sure that garlic is not burnt)
*stuffing is ready..keep aside.


For dough-


*Take a bowl,add maida, wheat flour ajwain,refine oil and salt.
*Make a soft dough using enough water.cover it and rest for 10 minutes
*After 10 minutes knead again for 2 minutes.
Atta ( dough) is ready to use.

Method for paratha-


*Divide 8 equal portion of the dough.Make peda of each portion.

* Take one peda in your hand and make a katori of dough with the help of your finger and Palm.

*Take one portion of dough and make a small katori with help of your palm.

*Fill one tablespoon of stuffing mixture hara luhsun green chilli (portion) in it,   Bring together all the sides in the centre and seal the all edges tightly.

*Press it like peda with help of your palm.
*Use wheat flour for dusting it (for rolling it)

*Roll again into a circle of 140 mm (5’”) diameter circle with the help of a little flour (wheat flour)

*Heat the tava ( griddle) on medium heat and cook it  using one tsp of refine oil each side of paratha until you will find brown golden spot on it.


Serve hot with chutney ,raita, aachaar and salad.


My mom tips -

* Always cook parathas in medium heat..it will come out very  tasty and crispy.
* Never cook paratha in low heat ,because it will harden the paratha texture.
*Never overcook the the green garlic while saute the green garlic leaves.
* Roll paratha very lightly otherwise stuffing will come out.( do not press it hard)


So friends,
Include this paratha in your breakefast and enjoy the goodness of garlic naturally.


That's all for today.

We will back very soon with some more rich taste of India.

Till then we are signing off.

Bye.
Take care.

Asha
Archana

Our thoughts,
Cook & share
Happy Cooking.


Saturday, 27 February 2016

Party special - Cream of spinach soup


                    Cream of spinach soup


Hi,
Everyone.

Welcome to our kitchen.

Today,we are making very simple and easy soup.
Rich and royal, awesome... Lip smacking cream of spinach soup.

A perfect soup for any party..delicious by taste and texture..mouthmelting..
Mouthwatering..divine taste that I can ever taste in my life!

So friend,
I can't stop myself to sharing my damn favourite soupy,tasty,yummy party style cream of spinach soup.


I am sure,if you include this recipe in your menu,your party will be rocking like anything.


Let's note down very quickly the ingredients and the right recipe of this awesome my all-time fav soup--Cream of spinach soup.


So ..I am here with a health boosting soup. This awesome soup is appreciated by my whole family.
Rich in taste..and healthy too.
Try this awesome creamy soup...I am sure you will be happy to make this creamy version of soup.


Let's us make this warm creamy sip of soup and enjoy your evening.


I am sure your family members will enjoy every sip of this very special creamy soup.(especially kids will enjoy it).


In other sessions I shall share many more yummy healthy soup recipes.


First we make this one..
Come and join me..

 Cream of spinach soup.


Preparation time: 5 -7 minute
Cooking time15-20 minutes
Serve 4 bowl


Ingredients-

6 cup of spinach ( palak- wash,cleaned and finely chopped)
4tbsp(tablespoons) of butter
2 large onion ( finely chopped)
1 tsp of grated ginger
1/2 tsp of finely chopped garlic
3-4 tablespoons of cornflour
or(maida/refine flour)
2cup of milk
4tbsp fresh cream
21/2cup water
Salt to taste
1tsp crushed Pepeer powder( prefer white pepper powder)

 Method-


*Heat butter in a non stick deep pan.
*Add chopped onions,grated ginger and garlic.Saute for 2-3 minutes on medium heat while stirring occasionally.
*Add spinach and saute for another 3-4 minutes, while stirring occasionally.
*Add 2 1/2 cup of water or (add more or less according to your preference).
*Cook on medium heat for 2-3 minutes while stirring occasionally.
*switch off the gas.
let them cool down completely.

*when it becomes cool, drain the excess water.( keep aside this water and use accordingly to the soup if needed.)
*Puree the spinach mixture to the mixer grinder. ( do not through the excess waste water extract of spinach.. Use in your soup accordingly.)


*Meanwhile in a another pan add cornflour in a milk.Mix well.
*Heat a pan ,add spinach puree along with spinach excess water.
*Add conflour milk mixture slowly by slowly into your spinach puree..
*Make sure that this time your heat is very low.( simmer) otherwise the soup may curdle.
*Mix well .Cook on slow heat for atleast 10 minutes,while stirring occasionally.

*Increase the heat,add salt and pepper powder and cook for 3-4 minutes.

*Check the consistency,It should be not very thick and nor very thin. If you think that water is needed then adjust water to your preference.

*Lastly add fresh cream. stir well.
*Switch off the gas.
Garnish with fresh cream.

*Serve hot with bread stick/krutons and enjoy this very yummy, tasty rich and royal warm soup.


My mom tips-

*Always add milk in soup when heat is low otherwise it may curdle the soup.

*Never overcook spinach while making soup because it may reduce the nutrition of spinach as well as its colour.

*Use milk in your soup , it will enhance the taste of soup.

*Use ginger and garlic in your soup for good taste as well as good for health.


I am sure that you will be happy to make this awesome soup and enjoy basant.


Note-
Tbsp-- tablespoon
Tsp- teaspoon.


That's all for today.
We shall come very soon with some more mouthwatering exciting recipes.

 Keep watching us.
Thanks for reading my blog.


We signing off ,
Bye.
Take care.


Asha Archana


Our thoughts,

Cook & share
Happy cooking.

Saturday, 13 February 2016

Valentines day special- Delicious gulab jamun


                            Gulab jamun


 Hi
Everyone,

A very warm welcome to our kitchen. Today is valentines day..
Everyone is trying for new recipes for this special day..some people makes cakes, cookies, chocolate but we want to celebrate this with tradional way..

Just with all-time favourite ..gulab jamuns..rich and royal for its taste.

My bhabhi's favourite.... Gulab jamun.!
She is very fond of these gulab jamuns..

Today, we are going to share with you both traditional and instant method of  making gulab jamuns.

We love to make this rich awesome sweet and enjoy it with our family members.

So,
Why you are waiting?
just make it for those you care and love.!
Cooking and making some awesome recipes for your Valentine is best way to express your love to them!

Sweet warm gulab jamun with ice cream goes awesome  in taste!

So,
Celebrate your special day with this Indian traditional delicacy.
Lip smacking gulab jamun are waiting for you.

Let's make the delicious galab jamuns.

I have made two types of gulab jamuns...traditional and  instant method..
With two type of colour..light golden brown and dark brown in colour.
You can make with any method with your preferences.


Gulab jamun-  ( Traditional method)

Preparation time:10 minutes
Cooking time:35 minutes
Makes 8 gulab jamuns

Ingredients-
For the gulab jamuns -

1 cup grated khoya/ mawa
1/2 cup grated/mashed paneer
5 tbs refined flour (maida)
1tsp sugar
1/4 tsp cardamom powder( optional)


For the filling-

1 tbsp of finely chopped pistas
Few soaked saffron strands in 2 tsp of water

For the sugar syrup-

2 cup sugar
A few saffron strands (kesar)
1 cup water
1-2 wedges of lemon or 2-3 tsp of milk

For frying the gulab jamuns
Ghee/ refine oil for deep frying


Method-

For the sugar syrup-

*Heat 1 cup water in a large heavy bottom pan add sugar and lemon wedges or milk.
( the milk or lemon wedges help to reduce the impurities of sugar syrup.)


Dissolve the sugar in  a water and bring to boil.
Discard the impurities of sugar syrup with the help of ladle.
Make sure that sugar syrup is clear..( there should be no dirt in syrup.)

*Simmer the heat and cook the syrup till the syrup is of one string consistency.

*Add the kesar (saffron) and keep aside.

For the gulab jamuns-

*In a bowl, combine khoya; refine flour, 1 tsp sugar, grated /mashed paneer and cardamom powder.
Mix well and knead firm dough very lightly with your palm/ hand without using any water.

*Divide the mixture into 8 equal portions and roll into a round shape (like a medium size ball).
Take one portion of a mixture (ball) and make a small katori with help of your palm.

*Fill the finely chopped pistas and and one thread of soaked saffron strand in it.
Bring together all the sides in the centre and seal the all edges tightly.

*One should take care while rolling the ball, because there should have no cracks on the surface, otherwise the gulab  jamuns will cracks while frying.

*Heat the ghee in a heavy bottom kadhai/ pan.
*Take 4 balls in a batch and deep fry in a ghee over slow flame till the gulab jamuns are golden brown in colour.(it takes  8 to10 minutes).( here I made two colours light golden brown and darm brown in colour.)
You can make with your preference..  Make with,which colour suit you.

*Likewise fry all the gulab jamuns balls.
* warm up the sugar syrup for 3-4 minutes in medium flame.
*Drain and put all the gulab jamuns in warm sugar syrup simmer the heat, take a one boil over slow flame.
*Soaked in syrup for 2 to 3  hours.
*Gulab jamun is ready to eat.
Serve warm.


My mom Tips-
*one should take care while rolling the ball. There should not have any cracks on the surface otherwise it will crack while frying it.
*Gulab jamun should be fried in a ghee / refine oil over slow flame for atleast 8 to 10 minutes as otherwise the inside will remain uncooked.

*Make sure that the sugar syrup is warm enough when you put the gulab jamun in the sugar syrup, otherwise gulab jamuns will not soaked  the syrup.
* Make sure that sugar syrup should be one string consistency only.


Let's make with instant method of  gulab jamun.


                    Instant gulab jamun

Instant gulab jamun.

Preparation time: 10 minutes
Cooking time 25 minutes
Make 8 gulab jamuns

Ingredients-
For sugar syrup-

2 cup sugar
1 1/2 cup water
Few drop of lemon or 1 to 2 lemon wedges
Or 4-5 tbsp of milk

For gulab jamun-
1 table spoon maida/ refine flour
2-3 tsp (tea spoon) sooji (semolina) - soaked in a 2 tbsp of water
1/2 cup or 5 table spoon milk powder
1 pinch of baking soda / 1/4 tsp of baking soda.
2-3 tbsp milk
1 tsp of ghee ( clarified butter) ( tea spoon)

Ghee / refine oil for frying

Method-

For the sugar syrup-

*Heat the broad non stick pan /kadhai.
*Add 1 cup sugar and 1 and 1/2 cup water.
*Add lemon wedges to the syrup.let it boil for a minute.
( remove the dirt / impurities of sugar syrup with the help of laddle)

*Mix well and cook on medium flame for 4 to 5 minutes while stirring occasionally or till the sugar syrup become of 1 thread consistency. Keep aside.

For gulab jamun-

*Take a bowl add maida,soaked sooji,milk powder and 1 tsp of ghee .
Mix well.
*Add baking soda.mix well.
*Add little amount of milk at a time ( 2-3 tbsp milk).mix well.
* If needed  again add 2-3 tsp of milk.
*Mix lighly with our hand.( do not knead as a wheat flour)
Just lightly mix all the ingredients.
Rest it for couple of minutes ( for 5 minutes)
*Grease your hand / palms with  little amount of ghee.
Divide the mixture into 8 equal portion.
*Make round crack less ball of each portion with help of your palm.
*Heat the ghee/ refine oil in a kadhai / pan.Make sure the  ghee / oil is heated enough to fry these balls.
( the oil/ ghee  shouldn't be over heated or under heated.
Take a very small portion of mixture and put it in a oil/ ghee.if oil/ ghee is heated enough it will come upside in oil and start frying.. It is a right time to dip the ballsinto the oil/ ghee.
* Add 3-4 ball at a time in a ghee/ oil.
* Cook on medium heat until the gulab jamun balls are light golden brown in colour.
Take it out from oil.
*likewise fry all the balls.
* warm up the sugar syrup for 3-4 minute on medium heat.
* put all the balls / gulab jamun in warm sugar  syrup.
* stirr gentely that all sugar syrup coated the ball evenly.
* Switch off the gas.
* Rest it for 1hour for soaking the sugar syrup in gulab jamun.
* After that gulab jamun is ready to  serve.

* Use as required . if you like warm gulab jamun then just lukewarm the galab jamun,otherwise just  have it.
* I have a serving suggestion-- warm Gulab jamuns always goes very yummy with vanilla ice cream.
If You have ice cream, have it with them and enjoy the delicacies of Indian sweets.

That's all for today,
Have a nice day.
We will come back very soon with some more delicious recipes.


Till then,
We are signing off.
Asha
Archana.

Our thoughts
Cook&Share
Happy Cooking.


Thursday, 11 February 2016

Vasant panchami special- Sweet Boondi

                                  Sweet Boondi


Hi ,

Everyone,

Welcome to our kitchen! We are wishing all of u happy basant panchami and sarswati puja!
Today is basant panchami  and sarswati puja!

We are going to share all of you a sweet boondi for sweet basant panchami!

In this very  auspicious occasion , mamma always use to make some sweet recipes.. Like puas, sweet boondi and more!
I was very fond of  sweet boondi with besan sev in my childhood time.
I  am missing those days when sarswati puja was organized by us in our colony.
Many cultural activities were performed by our colony children..we were enjoyed very much!
Those days were gone but sweet memories are yet alive!


So,
we are  making sweet  and simple but tasty sweet boondi..


Sweet yellow and orange pearl size boondi..
Looking yummy !
I am using some silver foil for enhance the boondi look,but if you haven't it just skip it.


Let's make it with very simple ingredients easily available in our kitchen. We use food colour for good colour but you can skip it..boondi will also come out awesome without food colour,
If you are using food colour, make sure that this is from  branded authentic  good quality food colours.

So,
Without delay, take one sweet step to make  it.


Sweet Boondi


Preparation time: 10 minutes
Cooking time: 20 minutes
Makes 4 serving


Ingredients-

For boondi-

1cup besan (Bengal gram flour/ chickpea flour)
Ghee / refine oil for deep frying

For sugar syrup-

1cup sugar
1/2 cup water
1/2 tsp of saffron strands dissolved in 2 tbsp warm water
 or
good quality yellow and kesari ( orange) food colour.


Method-

For the sugar syrup-

*Heat the broad non stick pan /kadhai.
*Add sugar and 1/2 cup water.mix well. *Cook on medium flame for 4 to 5 minutes  while stirring occasionally or till the sugar syrup become of 1 thread consistency. Keep aside.


For Boondi-

*Combine besan, and 1/2 cup water in a bowl mix well till no lumps remain.
*If you think that the batter is thick, add few drops of water.
The batter should be pouring/dropping in consistency.( neither too thick nor too thin).
Whisk the battter for 5-6 minutes.cover it and rest for 10 minutes.
* Add saffron or yellow/ orange food colour or ( keasari colour) .
*Keep aside it.

*Heat the ghee in a kadhai and hold the jharni/ perforated spoon just over the kadhai/ frying pan.(neither too low height nor too much height)  pour 2 to 3 tbsp of the batter at a time over a round perforated spoon (boondi Jharni), tap the jharni so that the boondi drop directly in the hot ghee/ refine oil.(you can spread batter with spoon in jharni so that it will drop automatically in kadhai.)


  I use this jharni for making boondi.
*Check the boondi is round in shape or not if it does not happen or the boondi size is distorted, reduce the amount of water in making batter. Check the consistency.

* Heat the ghee / oil in a kadhai.. Check the heat is hot enough to make boondi..(put a drop of batter in kadhai to check whether it is hot or not.If the boondi rises up instantly into the oil,then it is ready to use..if not wait for a while  so the oil/ ghee heat up little more. ( always use  moderate heat for frying boondi).

*Deep-fry the boondi over a medium flame until it becomes  crispy and take out from the kadhai using palta/slotted spoon.

*Repeat the same step to make more batches of boondi.

*After that immediately put the boondi in warm sugar syrup mix well, cook on medium flame for 1 to 2 minutes or till the sugar syrup evenly coated all sides of boondi .
* Switch off the gas.

*Sweet juicy awesome boondi is ready to eat. Enjoy this basant panchami with sweet delicious boondi


My mom tip-

*If you find the boondi batter(besan batter) is very thin ,mix some amount of besan to adjust the consistency.
Or
If you find that the batter is thick add some amount of water.
Check the consistency.. It should be pouring consistency( not very thin nor very thick)

*In this recipe the main trick is to make round pearl size boondi..

So ,please take care while making boondi.. If you your batter is not in pouring consistency it will flatten the boondi..

There should be whole in inner side of boondi.. It is necessary for making boondi to check your batter consistency.

*Do not overfry the boondi as it may become discoloured.

*Here I am using both of colours orange and yellow in our boondi for the boondi good looks.
You can use only one colour.
If don't have colour skip it and make boondi.
It will come out as awesome as coloured boondi.


*If you want to make sweet dry boondi..nothing to worry for it
Follow me..

*Make boondi just like above written method..
* Here you have to change the sugar syrup consistency..that's it!
* For dry boondi the sugar syrup should be 2 thread consistency. Once you add the boondi in sugar syrup ( above written) cook on medium flame for 3 to 4 minutes, while stirring occasionally.
*Make sure that sugar syrup is evenly coated each side of boondi.
*Switch off the gas and let it cool down completely.
After 1 hour ,you will find the boondi are dry.

Your delicious boondi is ready to serve.

That's all for taday.


once again happy basant panchami!

We are signing off.

Asha
Archana

Our thoughts
Cook & Share
Happy Cooking.


Sunday, 7 February 2016

Winter special- Hara matar ka paratha(Green peas paratha)

                           Hara matar ka paratha

Hello,

Friends,

Welcome to our kitchen.
 Green peas are abundantly avaliable in market in winter.
Today we are going to make a delicious crunchy greeny parathas using green peas.

 My all time favourite peas  are rich in protein. Protein is necessary for building muscle  for growing children.

Make this green parathas for breakfast as well as for lunch for your kids.
Not only for kids but for all members of your family and enjoy delicious comments from them.

Richer  awesome taste of peas parathas make your day more delighted.

Come with me,
Let's us quickly make this parathas.


Green peas parathas-
( Hara matar ka paratha)


Preparation time- 10 minutes.
Cooking time- 15 minutes
Makes- 6 parathas.


Ingredients-

3cup Boiled mashed hara Matar.
1/2 cup Onion (finely chopped)
1 tbsp ginger (finely chopped/ grated)
1/2 tsp cumin seeds (jeera)
1tbsp of green chilies (finely chopped)
1/4 tsp red chili powder
1 tsp garam masala powder Salt – to taste Ghee—2tbsp


For the dough-
2 cup of Wheat flour (gehun ka Atta)
1/2 cup of maida ( refine flour)
Water- as needed
Salt- a pinch
Ghee- 1 tbsp (melted)

Other ingredients-

Ghee/ refine oil for for making (greasing) paratha.
Wheat flour – for dusting (rolling parathas).


Method-

*Combine wheat flour, maida ( refine flour),ghee and a pinch of salt in a bowl,mix well.
*Knead into a very soft dough using enough water. Cover it and Keep aside and rest it for 10 minutes.

For Filling – (stuffing)-
*Heat the ghee in a non stick pan. Add cumin seeds, let them crackle.
*Add onion, sauté on medium flame for 2 minutes or till it look slight brown in colour.
*Add ginger, saute for a minute.
*Add red chilli powder and green chilies, garam masala powder, saute for a minute.
*Add boiled, mashed hara matar and salt.
*Mix well.
*Cook for another 1 minute on medium flame, while stirring continuously.
*Remove from the flame.
*Cool it completely.
*Divide the stuffing into 6 equal portions.

For parathas—
*Make 6 small balls (portion) from dough. *Take one portion of dough and make a small katori with help of your palm/ finger.
*Fill one hara matar ball (portion) in it.
*Bring together all the sides in the centre and seal the all edges tightly.
*Press it like peda with help of your palm.
* Use wheat flour for dusting it (for rolling it)
*Roll again into a circle of 140 mm (5") diameter circle with the help of a little flour (wheat).
*Heat a non stick tava (griddle) and cook the paratha using little ghee/refine oil until gold brown spot on the both sides.
*Repeat the same procedure, with the remaining dough and make 5 more parathas.
*Serve immediately with fresh curd, or chutney.

Enjoy winter with lots of greeny veggies.
Make crunchy tasty peas parathas in this
winter.
Ya- make for your family and friends and do enjoy your cold winter with warm parathas.


That's all for today.
We will come with some more exciting simple and tasty recipes.

Till then ,
Bye.

Take care.

Asha
Archana

Our thoughts
Cook& share
Happy Cooking.


Winter special- Hara chana ka paratha


                       Hara Chana paratha


Hi,
Everybody,

Welcome to our kitchen.
Today we are going to make hara chana ka paratha.
Very rich in protein and tasty too.
Ya,
Winter unfold many sweet and sour memories along with some very special recipes.
In my home, we are waiting for winter because winter come with lots of greeny veggie along with sweet and sour, chatpata recipes.

My mom is very fond of hara chana.
Here I am sharing you her favourite hara chana paratha.
( A green  bengal gram paratha)

Easy to make and delicious too.

Make variety of parathas in winter and enjoy your winter.

So friends,

Let's us quickly gone through the right recipe here.


Preparation time- 10 minutes
Cooking time- 15 minutes
Makes- 6 parathas


Ingredient-

3cup Boiled and mashed hara chana
1/2 cup Onion(finely chopped)
1 tbsp ginger(finely chopped/ grated)
1/2 tsp cumin seeds (jeera)
1tbsp green chilies (finely chopped)
1/4 tsp red chili powder
1 tsp garam masala powder
Salt to taste
Ghee 2tbsp


For the dough-

2 cup wheat flour (gehun ka Atta)
1/2 cup refine flour ( maida)
Water as needed
Salt a pinch
Ghee 1 tbsp (melted)

Other ingredients
Ghee/ refine oil for making (greasing) paratha
Wheat flour for dusting and rolling parathas.


Method-

*Combine wheat flour, maida( refine flour) ghee and a pinch of salt in a bowl. mix well.
*Knead into a very soft dough using enough water.
*Cover it and keep aside. Rest it for 10 minutes.

 For Filling – (stuffing)

*Heat the ghee in a non stick pan.
Add cumin seeds, let them crackle.
*Add onion, saute on medium flame for 2-3 minutes or till it look slight brown in colour.
*Add ginger, saute for a minute.
*Add red chilli powder and green chilies, garam masala powder, saute for a minute.
*Add boiled mashed hara chana and salt.  mix well.
*Cook for another 1 minute on medium flame, while stirring continuously.
*Remove from the flame.
*Cool it completely.

*Divide the stuffing into 6 equal portions.


For parathas—

*Make 6 small balls (portion) from dough.
*Take one portion of dough and make a small katori with help of your palm and fingers.
*Fill one hara chana ball (portion) in it. *Bring together all the sides in the centre
and seal the all edges tightly.
*Press it like peda with help of your palm.
*Use wheat flour for dusting it (for rolling it)
*Roll again into a circle of 140 mm (5") diameter circle with the help of a little wheat flour.
*Heat a non stick tava (griddle) .
*Cook the paratha on medium heat using little ghee/ refine oil until golden brown spot on the both sides.
*Repeat the same procedure with the remaining dough and make 5 more parathas.
*Serve immediately with fresh curd or chutney.

Relish winter with awesome hara chana paratha. I am sure that you will love to make it and enjoy its tasty bites with your family.

My mom tip-

*Use ghee while making parathas for richer taste.
*Make a very soft dough for paratha, otherwise it will come out while rolling it.
*Always check your heat while making parathas. For nice crunchy delicious parathas - make sure that your heat is medium while cooking parathas.
If the heat is low it will  come out harder.
If the heat is high it will burn parathas.
A good crunchy parathas should be golden brown in colour.
*Do not compromise with ghee/ refine oil while cooking parathas. One tsp each sides are enough for  good paratha.


That's all for today,
We will come with more delicious recipes very soon.

Till then ,
We are signing off.
Take care and stay blessed.

Asha
Archana.

Our thoughts,
Cook& share
Hapyy Cooking.


Friday, 29 January 2016

Winter special- Cheesy Broccoli mushroom soup

               Cheesy Broccoli mushroom soup


Hi,
everybody,
Welcome to our kitchen.
Winter is incomplete without soup.
Today we are making very tasty, yummy soup..which is made from broccoli carrots, paneer and mushrooms.
Very healthy and very tasty.

Let  you know first that how beneficial broccoli is?

*It is anti microbial and anti oxidant.
*Good source of fibre
*protect eye.
*prevent cancer.
*Rich in calcium
*Anti viral
*Boost immunity
*beneficial for pregnant women
*Beneficial in high blood pressure
*Good source of protein
*Improve skin glow
*Fight heart disease
*Fight diabetes
*prevent cold
*support detoxification
*promote hair health
*Boost brain power
*Aids weight lose


Let you know the benefits of mushroom too!

*Excellent source of selenium which is good for bladder
*Rich source of vitamin B2 and B3
*Low in calories and sodium
* Stimulate absorption of iron
*Reduce blood pressure
*Prevent breast and prostrate cancer
*Help lowering cholesterol
*Protect diabetic from infections
*Boost immune system.
*High in vitamin D
*High in anti oxidant
*Good for weight management(help lose weight)
*Destroying cancer cells and or facilitating nerve regeneration.
*Eradicating viruses (including flu and small pox ( bacteria- Ecolli and yeast)


Here, I want to share the special benefits of mushrooms --  if  you haven't sun light in your home and you are unable to  take/restore vitamin D through sunlight then...
please increase the intake of mushrooms in your diet..because it  can be substitute of the benefits of vitamin D through sun light.


So ..I am here with a health boosting soup.


This awesome soup is appreciated by my whole family.
Rich in taste..and healthy too.
Try this awesome chessy soup...I am sure you will be happy to make this cheessy version of soup.

Let's us make  this warm cheesy sip of soup and enjoy winter.
I am sure your family members will enjoy to sip of this very special cheesy soup.(especially kids will enjoy it).

In other sessions I shall share many more yummy healthy soup recipes.

First we make this one..
Come and join me..


               Cheesy Broccoli mushroom soup

Preparation time: 5 -7 minute
Cooking time:20- 22 minutes
Serve 4 bowl

Ingredients-
5-6 florets of Broccoli( wash,cleaned and finely chopped)
6-7 button mushrooms( wash, cleaned and finely chopped)
1 medium size  gajar (carrot) (wash and cleaned and finely chopped- julienned)
50 grams paneer ( cottage cheese) cut in very small pieces
2tbsp(tablespoons) of butter
1 large onion ( finely chopped)
1 tsp of grated ginger
1/2 tsp of finely chopped garlic
3-4 tablespoons of cornflour or(maida/refine flour)
2cup of milk
2 tbsp fresh cream
2-3 tbsp grated  processed cheese
21/2cup water
Salt to taste
1tsp crushed  Pepeer powder( prefer white pepper powder)


Method-
*Heat butter in a non stick deep pan.
*Add chopped onions,grated ginger , garlic and saute for 2-3 minutes on medium heat, while stirring occasionally.
*Add broccoli, gajar and mushrooms. Saute for another 3-4 minutes, while stirring occasionally.
*Take One tablespoon of cooked veggies and keep aside for garnish.
*Meanwhile in a another pan add cornflour in a milk.Mix well.
*Add conflour milk mixture slowly by slowly into your veggies.
*Make sure that  this time your heat is very low.( simmer)
*Mix well and  add water .Cook on slow heat for atleast 10 minutes, while stirring occasionally.
*Add paneer,cheese, salt and pepper powder.
*Cook for 3-4 minutes.
*Check the consistency,It should be not very thick and nor very thin.
If you think  that water is needed then adjust water to your preference.
* Lastly add fresh cream. stir well.
*Switch off the gas.
*Garnish with cheese, broccoli and carrot. (Gajar)
Serve hot with bread stick and enjoy this very yummy tasty warm soup.

My mom tips-

* Always add milk in soup when heat is low otherwise it may curdle the soup.
*Never overcook veggies while making soup because it  may reduce the nutrition of  veggies.
* Use  fresh cream if you use milk in your soup , it will enhance the taste of soup.
*Cut veggies very finely in soup for good taste.
*Use ginger and garlic in your soup for good taste as well as  good for health.


I am sure, that you will be happy to make this awesome soup and enjoy winter .


Note-
Tbsp-- tablespoon
Tsp- teaspoon.

That's all for today,
We shall come very soon. With some more exciting recipes.
Keep watching us.

Thanks for reading my blog.

We signing off ,
 Bye.
Take care.

Asha
Archana

Our thoughts,
Cook & share
Happy cooking.


Tuesday, 19 January 2016

Winter special- Methi paratha

                               Methi paratha

Hi, everyone,

Today, we are making fresh green methi paratha. In our home, We use methi leaves in our daily meal by any form in winter.
Not only for the health point of view, but we  love its smell as well as it's taste.
We use fresh greens methi as well as dried one.
we use kasuri methi  in our main course meal for enhancing the taste of recipe.

My mom always use to dried methi leaves in a sun for 4-5 days and store it for summer.
Actually the dried methi is known as kasuri methi in market.

So if you have abundant sun light ,use it and make kasuri methi at your own.

Let's know how beneficial methi are(fenugreek)  --

*It reduces cholesterol and cardiovascular risk.
*It's help to control diabetes.
*It's a appetite suppressant-  good for weight loss.
*It help to cure sore throat.
*It's cure acid reflux or heartburn.
*It's relieve in constipation, prevent colon cancer.
* Good for kidney problem.
*It's help to reduce menstrual discomfort and minimize the symptoms of menopause.
*It's help to increase breast milk production.
* Good for skin.

So, guys,
See the benefits of methi( fenugreek).

We should eat methi in any form as a green or  as methi seeds..

Use methi in sabzi, paratha, rice..whatever you want to make!

Make ladoos using methi seeds..my mom says that it has very warm effect and good for winter.
In another session ,I shall share you how to make methi or gond ladoos. These ladoos are very beneficial for your health specially in winter.

So guys,
Let's make methi paratha..


Methi ka paratha


Preparation time: 10 minutes
Cooking time: 15 minutes
Makes 6 paratha


Ingredients-

250 grams fresh wash and cleaned chopped methi leaves (fenugreek leaves)
2 cup wheat flour(  gehun ka atta)
1/2 cup  maida( refine flour)
1tsp-ajwain
Salt to taste
2 tbsp refine oil
2tbsp  fresh curd
1 tbsp fresh cream( you can use homemade Fresh cream/ malai)
2 tbsp gram flour( besan)
Lukewarm Water to knead
Refine Oil for making parathas


Preparation-

*Boil 2 cup water in a pan add methi leaves.
*Cook on medium heat for 2-3 minutes.
*Drain excess water in a seive.( chalnni)
* Squeeze out the  excess water.
*Use as required.


Method-

* Take a bowl add methi leaves along with refine oil,wheat flour and maida.
*Add fresh curd ,fresh cream, ajwain, salt and besan. Mix well.
*Make a stiff dough adding enough water.

*Cover it by lid and rest for 10 minutes.

*Divide 6 equal  portion of the kneaded dough.
*Take a one portion of dough,make a peda of it  dust by the wheat flour and roll out each peda into 140 mm or 5" chapati or as desired .

*Heat the tava/griddle and cook on medium heat applying 1 tsp of refine oil each side of paratha until you find brown golden spot on it.

*Make all parathas following above procedure.
*Serve hot with aachaar, curd or raitas and salad.


( My mom tip)-

*You can make parathas without boiling the methi leaves.

For this method-

you have to simply wash and clean the methi and  chopped it and add 2-3pinch of salt on it and mix well. And rest it for 20 minutes.
After that squeeze out extra water and use the same above procedure for making parathas.. These above procedure is necessary for reducing the bitterness of methi leaves.


( Following both of the procedures,  you will got nice crunchy, yummy parathas.

But we prefer boiling methi leaves because after that we find that  by mixing boiled  methi leaves in atta we got very good flexible (lachila) dough.

*Use lukewarm water for good texture of dough.

* By using fresh cream  in a dough make a paratha soft as well  as crunchy and tasty.

*you can make layered paratha or triangler in shape.
It's your choice.. Which shape you prefer.


I am sure you will be happy to make this paratha by making above method.

Make it now, and enjoy the winter with nice crunchy yummy bite of methi parathas.


That's all for today.

We will back very soon with..some more parathas recipes.

Till then..
Bye,
Take care.

Asha
Archana

Our thoughts
Cook& Share
Happy Cooking.


Wednesday, 13 January 2016

Makarshankranti special- Murmura ladoos and roasted chiwda ladoos


                           Murmura ladoo
        

Hi everyone,


Today we are making murmura ladoo.
It is traditional sweet making in time of winter especially on makarshankrati.

This is very easy recipe and loved by everyone.( specially kids like it very much).

Let's make murmura and  dry roasted chiwda ladoos.


Preparation time: 0 minutes
Cooking time: 10 -12 minutes
Makes 20 ladoos


Ingredients-

250 gram murmura
200 gram Gur ( jagerry)
1/2 cup water
1/2 tsp ghee for greasing palms.


Method-

*Heat a pan / kadhai .Add  Gur ( jaggery) and water.
*Cook for 5-6 minutes.  You find a syrup form bubbles and leaves the pan / kadhai.
It is right time to check the consistency. It should be thick syrup.

(How to check  whether it is done of not? Take a drop of syrup. put in bowl of water. After few seconds, check it. It should be hard enough to make a ball. ( a semi harden ball)
If it is  not done , cook for another few minutes. Check it again.
Once done , mix murmuras in it.
Mix  until murmuras  are  nicely coated with jaggery syrup.

* Rest it for few minutes.
* once cool.  (  Make sure it should be hot enough to make ladoo.( lukewarm )
Do not cool down the mixture completely.
In little hot temperature, you can easily make ladoos otherwise once it will harden it is very tough to make ladoos.
So make sure that the mixture is little hot.

*Take a small  portion(a ball like size).
*Roll it between your palms  to make round  ladoos.
*Repeat the same procedure to make all ladoos.

* keep aside and cool it completely.
* Once cooled, store in air tight container and enjoy it for 7-10 days.

You can make roasted beaten rice flakes ( chiwda) ladoos by following above written procedure.
But take roasted chiwda instead of murmura.


For this( roasted chiwda ladoos)
ingredients are


250 gram  dry roasted chiwda( beaten rice flakes)
200 gram Gur ( jaggery)
1/2 cup water
1/2 tsp of ghee for greasing the palms

Repeat the same above written procedure but add chiwda instead of murmuras.
                               
                     Roasted chiwda ladoo


Delicious crunchy roasted chiwda Gur ladoo and murmurs Gur ladoos are ready to eat.

Come and enjoy winter with murmura- chiwda jaggery preparations.

Happy eating.

Till then ,
Bye.

We are signing off .
We will come very soon with some delicious mouthwatering recipes.

Asha
Archana

Our thoughts
Cook& share
Happy cooking.


Makarshankranti special- Till Gur ladoo and tikki

                       Till Gur ladoo/Tikki


Hi Everyone,
Once again Happy Makarshankranti!
 On this very occassion we make various type of til sweet preparations.
Among them Till gur ladoo is very famous and made by every indians. It is a traditional sweet .

So,
we are here with Very famous Till Gur ladoo and til Gur tikki.

Muh toh meetha karo..

Ya, Without loosing much more time, let us make ladoos.

Preparation time:0minutes
Cooking time:10-15 minutes
Make 8-10 ladoos

Ingredients-
2cup white sesame seeds ( white til)
1cup jaggery( Gur)
1/2 cup water
1/2 tsp of  ghee for greasing hand

Method-

*Heat a pan/kadhai.
Add sesame seeds ,dry roast the sesame seeds in a pan on medium heat till they light golden brown in colour.
This will take around 5-6 minutes.

*you will find a nice aroma from them.
* once done,  let it cool down .
*keep aside.

* Heat a pan/kadhai. Add Gur jaggery ( Gur)
and 1/2 cup water.
*Cook on medium heat for at least 5-6 minutes or until the jaggery ( Gur) become thick syrup.
( How to check jaggery syrup ( Gur ki chasini)---
After 4-5 minute of cooking the Gur,you will find that Gur are forming bubbles and  leaves the pan / kadhai.This is a accurate time to check the consistency.

Take a drop of boiling  syrup put in a bowl  of  water. After few seconds, take it out.You will find it is harden enough to form a ball - make a  small ball.
If it is not done ( semi hard ball like consistency).Cook for another  few minutes and check again.
It should be thick syrup like consistency.
If you ignore this procedure, you will not get acqurate cruncy flaky tasty ladoos/tikkis.
This is very important part of making til - Gur ladoo/tikki.
So, make sure that your Gur ki chasini is forming bubbles and  leaving the pan.

*Once syrup is ready add roasted sesame seeds on Gur syrup. Mix it thougrouhly.
Keep mixing until seasame  seeds coated with jaggery syrup.

*switch off the gas. Rest for 2-3 minutes. Make sure that the mixture is not very hot.
It should be lukewarm.

*Grease your palm with  little ghee. Take a small amount  of til gur mixture to form small size ladoos.
*Roll it between your palm untill round enough and smooth in texture.
*Repeat the same procedure to make all ladoos.
( you can make tikki shape by pressing till - Gur mixture with the help of your palm.)

Rest it for an hour. Once it cool down it will little harden but chruncy.

*you can store these ladoos/ tikkis  in a air tight container for 7-10 days and enjoy eating it in evening or leizure time.


That's all for today.

Enjoy makar shakranti.

Till then,
Bye.
Asha
Archana

Our thoughts
Cook& Share
Happy Cooking.